Recently I’ve been experimenting with setting up custom face normals for my anime modeling work. For those that don’t know, normals are basically a vector pointing outwards from any face or vertex, used by 3D rendering engines to know when a surface is lit or unlit based on its angle from any light sources. Stylized work relies on cel shaders, which create uniform light levels similar to drawn cartoon rendering. Often times, especially on more complex models, we want to modify these face normals manually, which can create better looking shadow regions.
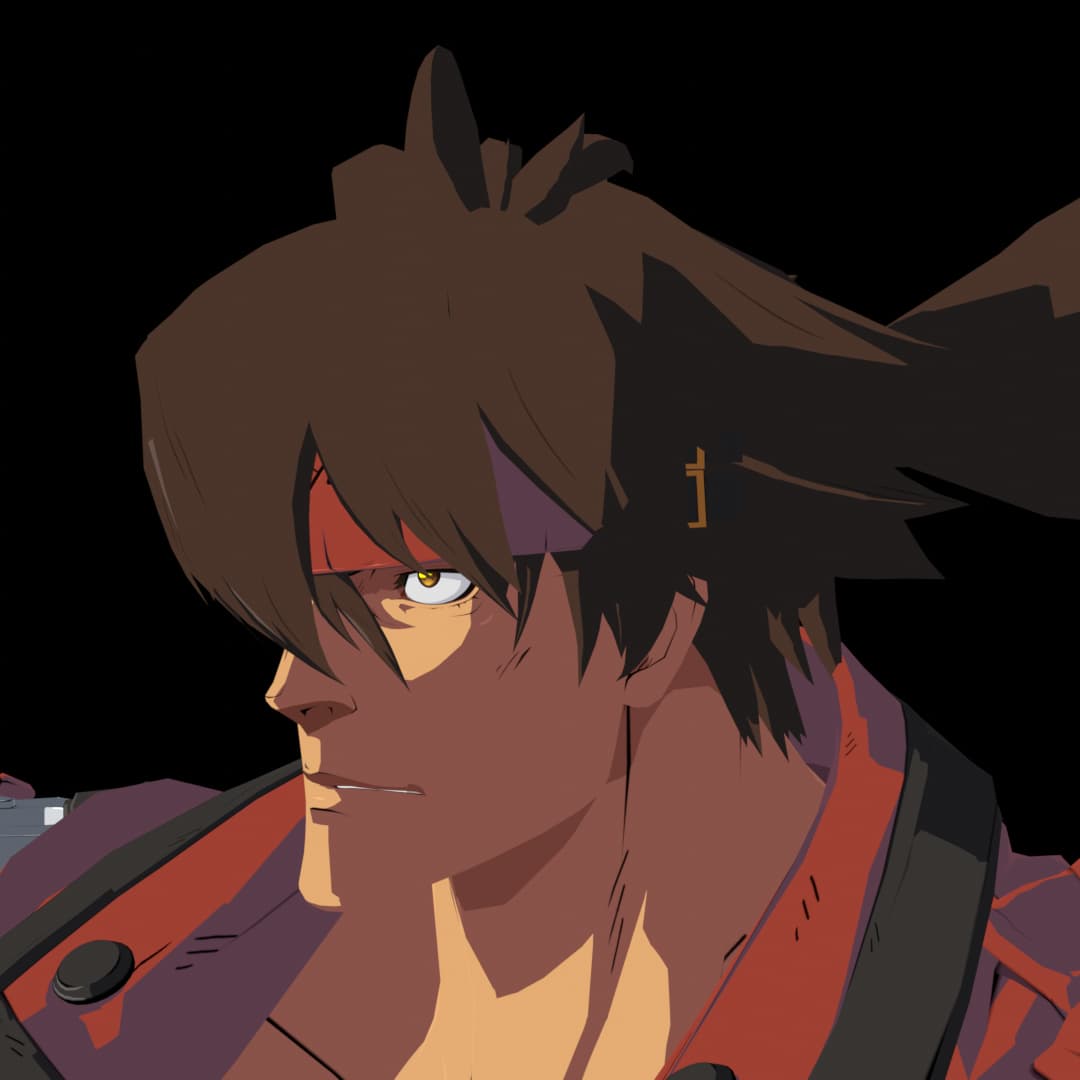
Sol Badguy from Guilty Gear Strive, with custom normals on the left, and default normals on the right. Both are taken with the same light settings.
Note how the left version of Sol Badguy looks way more dramatic! It leaves a much stronger impression over all. Look at how confusing the hair lighting is, with ugly blocks of shadow appearing and disappearing out of nowhere. Another thing to notice is the triangle of light underneath the eye. This is known as a Rembrandt triangle, which is a result of the light bleeding over the nose-bridge. This kind of effect isn’t usually possible without intentionally putting it there on a model.
While being a more advanced technique, the process of modifying normals is fairly straight forward. The simplest methods involve stealing normals from spheres using Data Transfer methods, or Spherizing them using plugins. I’d recommend watching this video if you’re interested in the process, especially for learning the manual methods :

I’ve avoided manual normal editing for most of my work, since the process seemed too difficult at the time. After trying it out though, I was able to get decent results pretty quickly. But eventually I realized that I didn’t quite know what I was looking for. I haven’t worked with brightness levels very often as an artist, especially since my work has relied on flat lighting or simpler toon shaders, with very simple texture work - so I’m inexperienced. I need to cover up this blind spot.
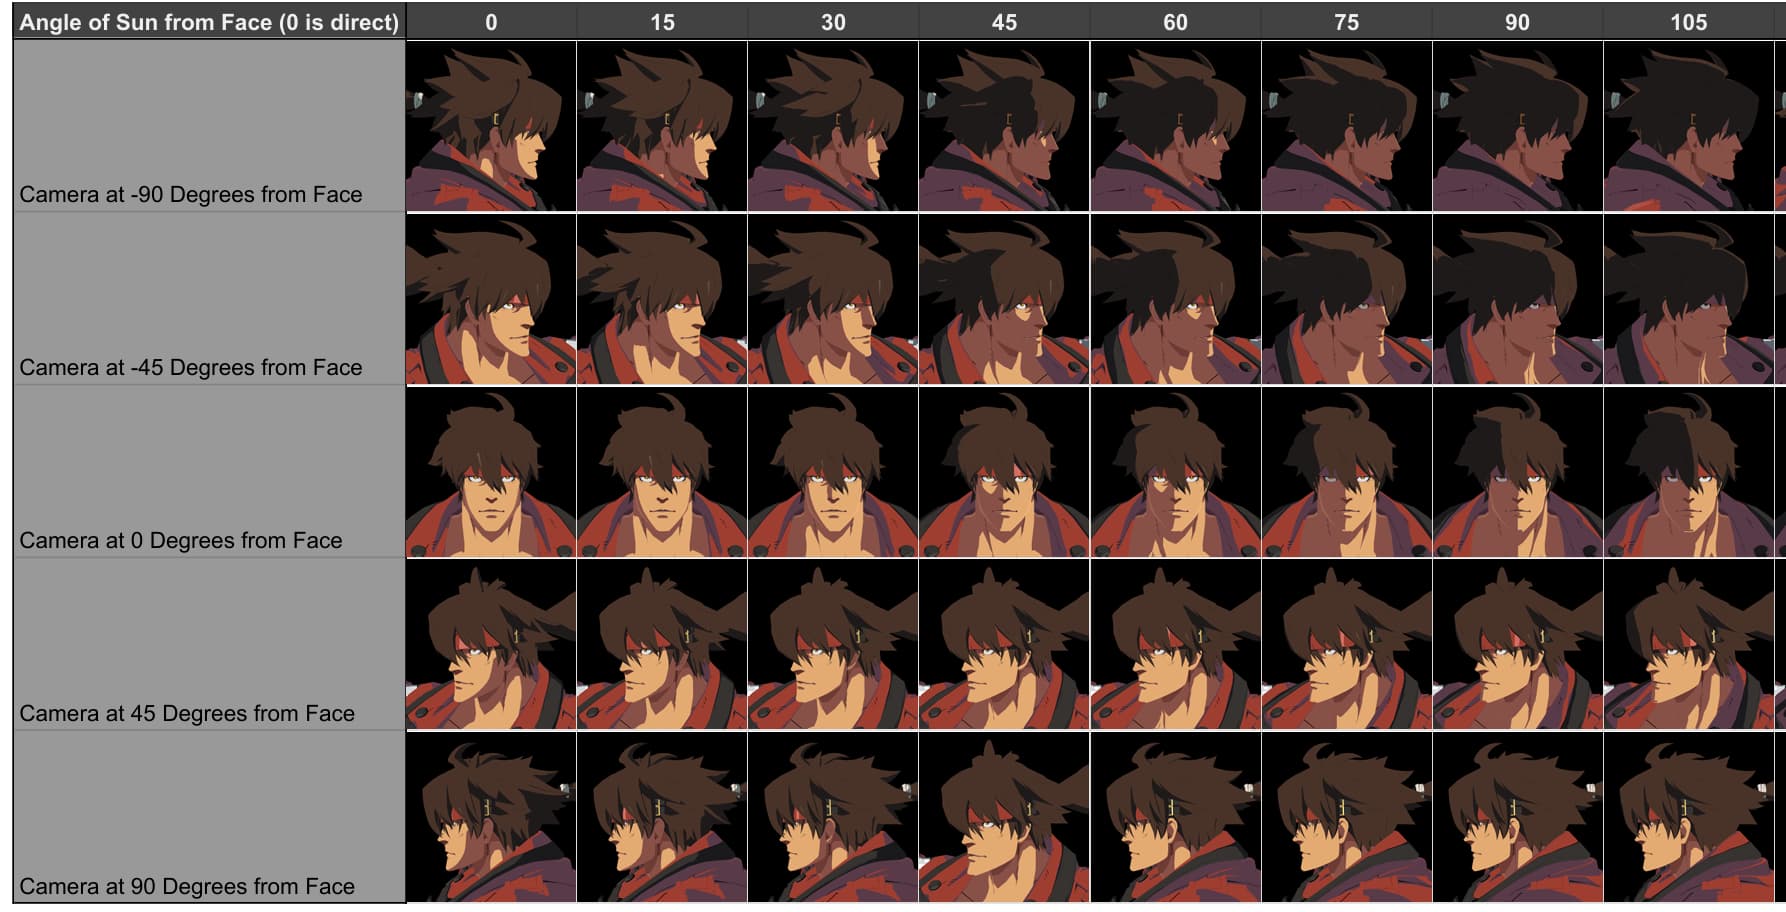
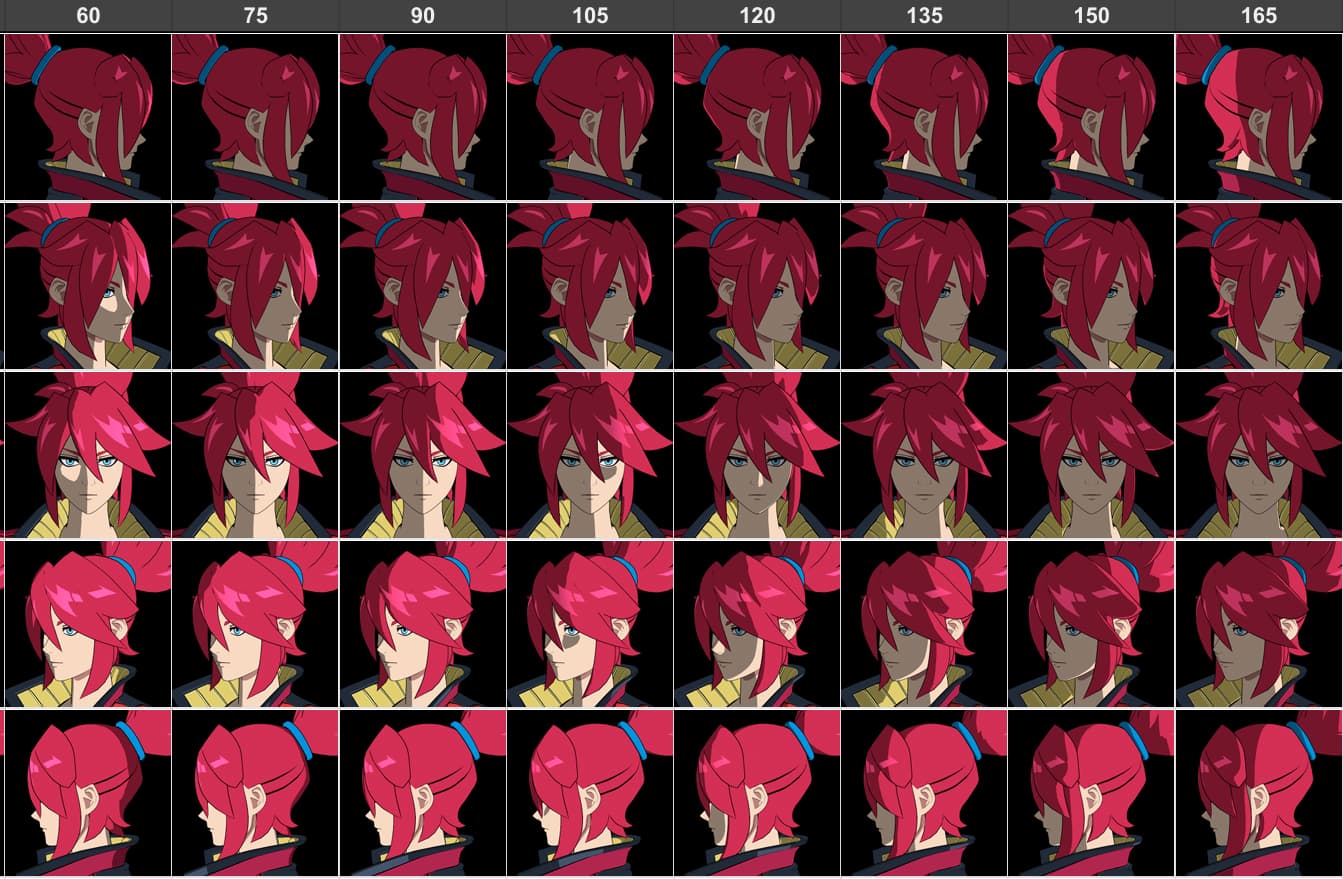
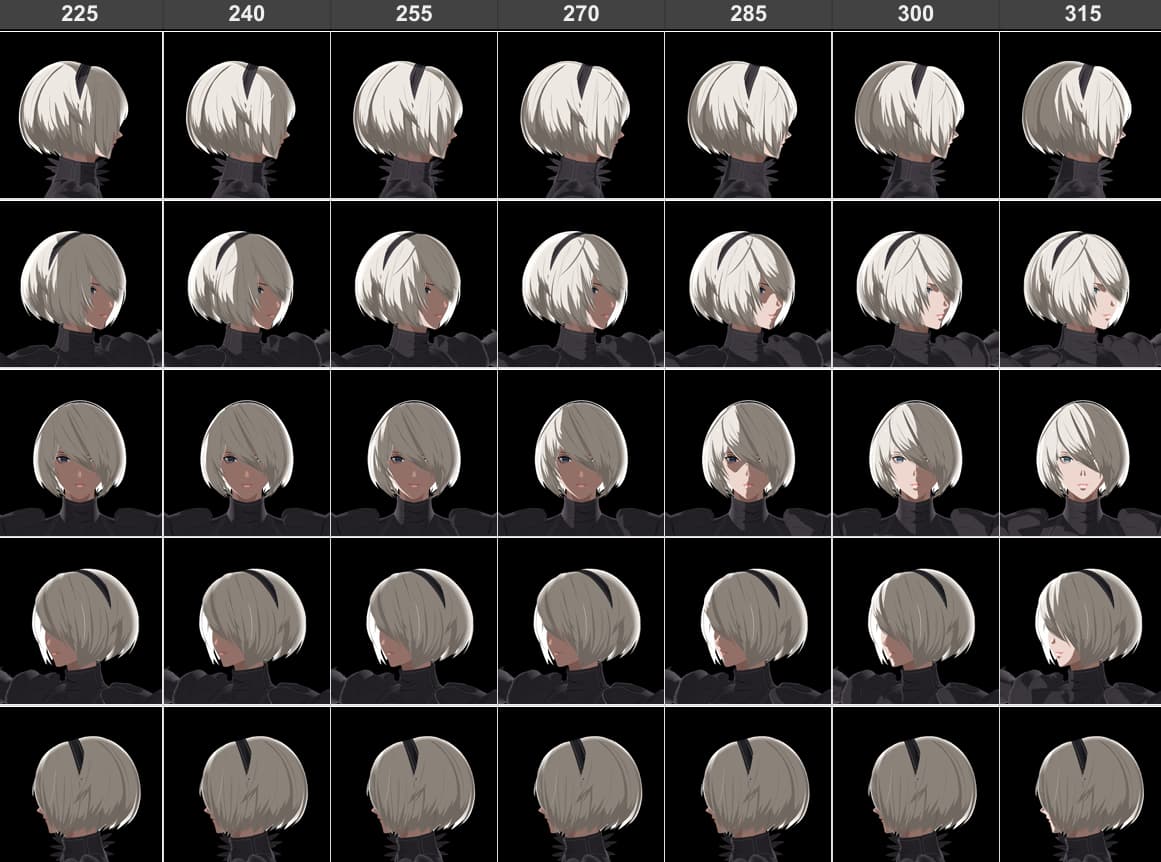
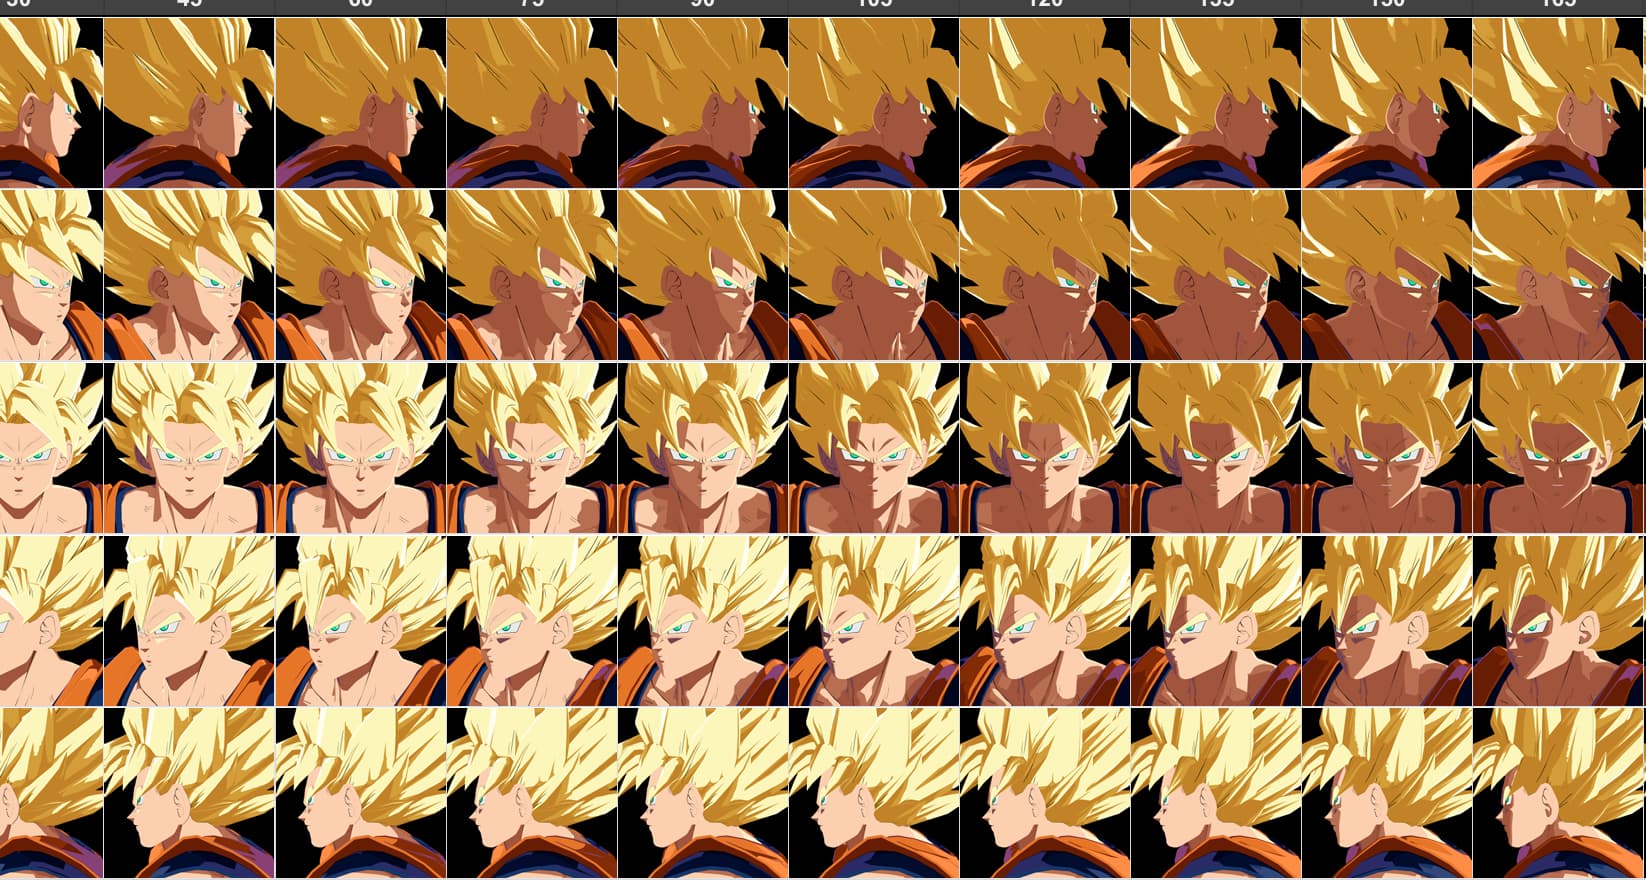
So I created this resource that compiles a variety of stylized models displayed at a variety of camera and light angles. All of the models in this reference sheet use modified lighting of some kind. Currently, they all come from Arc System Works, besides one model from HI-FI Rush.
You can view the reference yourself here:
The embed might say this sheet is private, but it shouldn’t be. View access should be available to anyone with the link.
I plan to add more models later, particularly those with the “gacha game aesthetic” found in games like Wuthering Waves and Genshin Impact. Those games rely on SDF maps to control the shadows, a secondary texture sheet that uses the color information to designate when the texture should be lit. This is an alternative to custom normals. I still want to add these to the resource, since the main purpose is to show faces at different light levels. You could theoretically make an SDF map to mimic the custom normal style of Guilty Gear, or make custom normals to mimic the result of Genshin’s SDF maps. It doesn’t really matter how it gets made here. The only difference is that SDF maps don’t usually handle multiple light sources. I talked about this a little bit previously:
Creating this reference sheet took a good amount of manual work, but thankfully I was able to automate part of the process. I wanted to capture the face at 45 degree increments, from -90 to 90, with the sun angle rotating at 15 degree increments. The end result was 120 images per model (5 camera angles * 24 light angles). I was initially tempted to manually screenshot these when I wanted to capture the lighting from 45 degree increments instead, but I realized those extra angles would be pretty useful.
So I setup a simple blender scene consisting of a camera, an animated sun, and then the model.
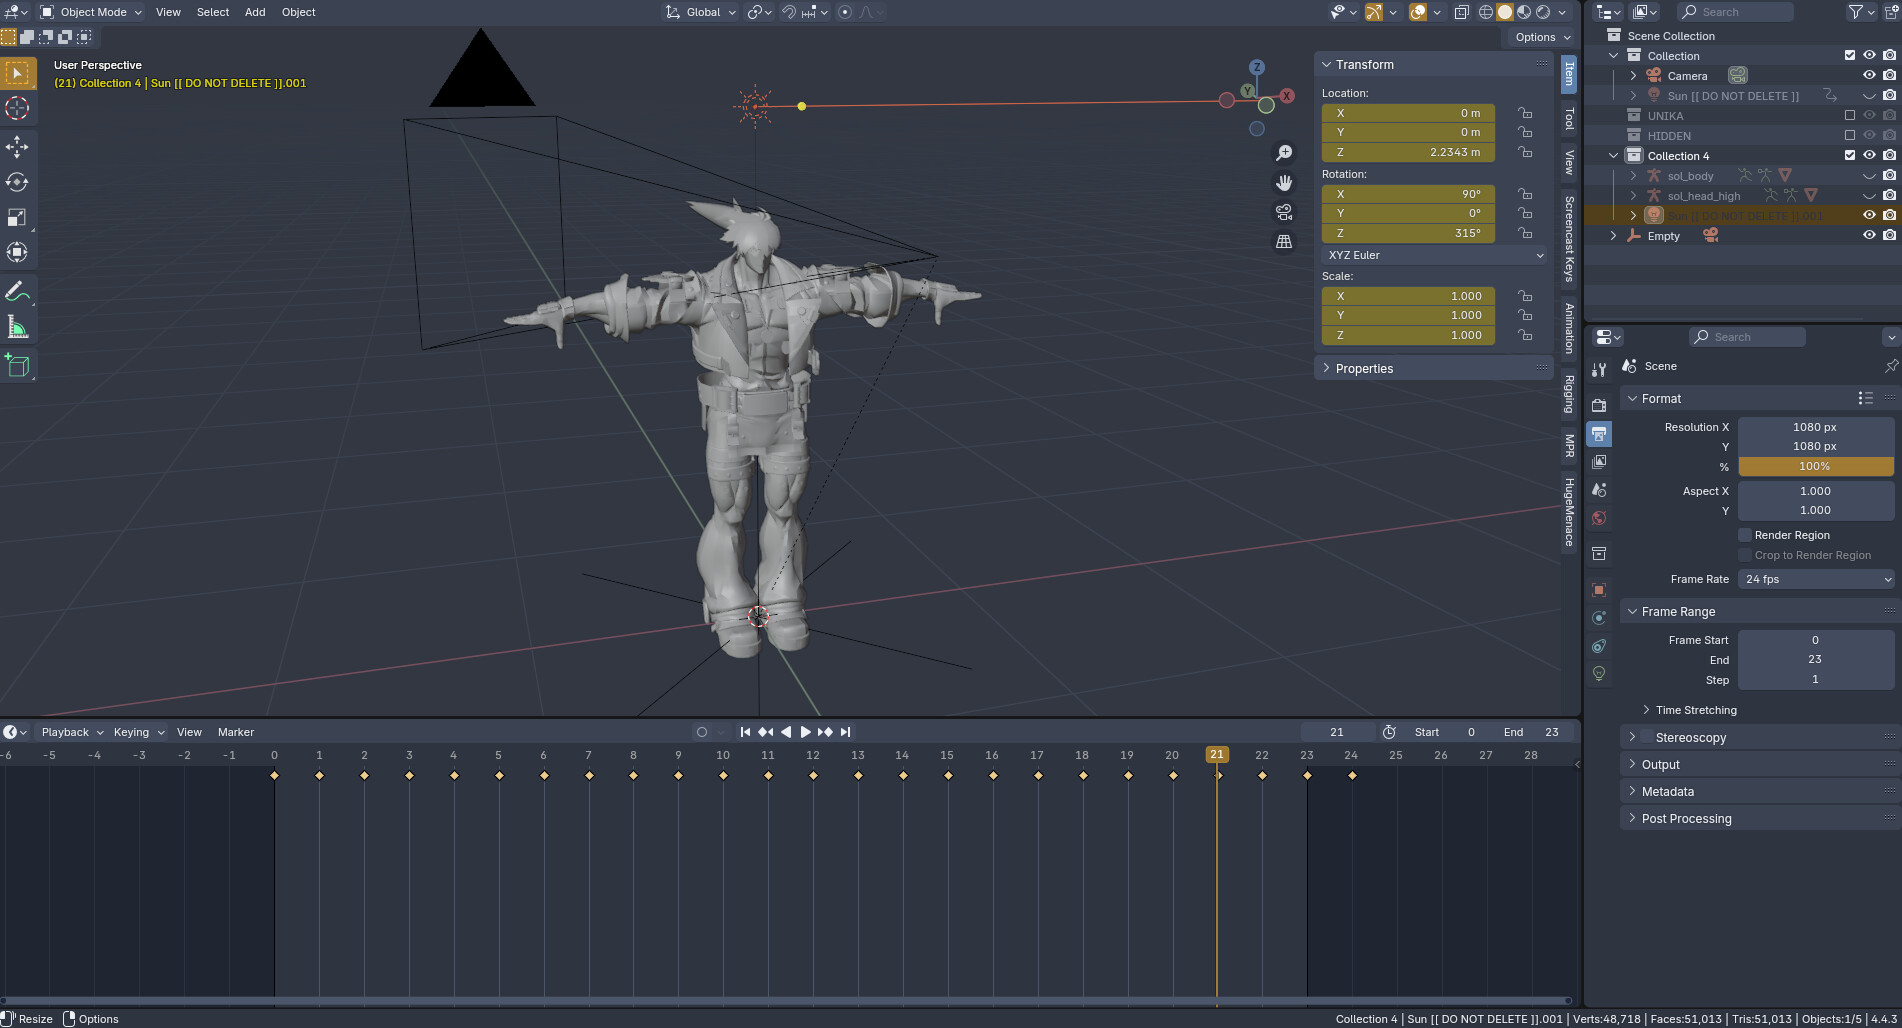
The camera was keyed from 0-360 on 15 degree increments for 24 frames. I would then render each of these frames as individual images, adjust the camera angle, rename the file, and then render once more.
Afterwards I uploaded all of these images to a publicly accessible google drive folder, and using a handy script generated by ChatGPT, I was able to automatically assign each frame to its own individual cell. I then manually adjusted the formatting myself.
Google Sheets App Script Code for Inserting Images from a Folder
function listDriveImageIDs() {
  const folderId = ''; // Get this from the folder URL
  const folder = DriveApp.getFolderById(folderId);
  const files = folder.getFiles();
  const sheet = SpreadsheetApp.getActiveSpreadsheet().getActiveSheet();
  sheet.clear(); // Optional: clear existing data

  const imageFormulas = [];
  const filenames = [];

  while (files.hasNext()) {
    const file = files.next();
    filenames.push(file.getName());
    const id = file.getId();
    const formula = `=IMAGE("https://drive.google.com/uc?export=view&id=${id}")`;
    imageFormulas.push(formula);
  }

  // Optional: Sort by filename (useful for frame_0000, frame_0001, etc.)
  const sorted = filenames
    .map((name, i) => ({ name, formula: imageFormulas[i] }))
    .sort((a, b) => a.name.localeCompare(b.name));

  // Extract formulas in sorted order
  const sortedFormulas = sorted.map(entry => entry.formula);
  const sortedNames = sorted.map(entry => entry.name);

  // Row 1: Filenames (optional, for reference)
  sheet.getRange(1, 1, 1, sortedNames.length).setValues([sortedNames]);

  // Row 2: Image formulas
  sheet.getRange(2, 1, 1, sortedFormulas.length).setFormulas([sortedFormulas]);
}
The process would have been insanely tedious without setting up the camera to render the way it did, and even more so without the Google Sheets Apps Script. Ultimately it took me about 12 hours total, between the process of ripping the models using UModel, setting up the materials for each model, rendering out the images, and then formatting it in Google Sheets.
Thanks for reading to the end. I hope you can get something out of this. If you want me to look at any particular model and render it out to the sheet, you can just comment a request down here. And if theres any part of the process you want me to elaborate on, especially working with the actual normals, feel free to ask!